
Ex BR(W) Coach 2180
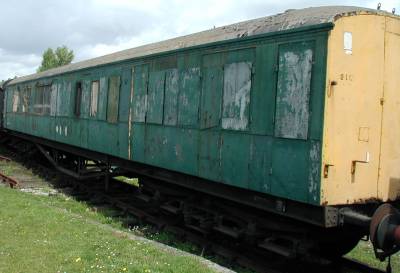 |
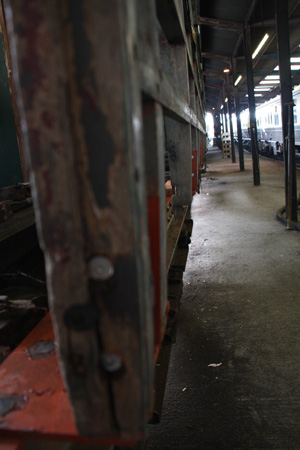
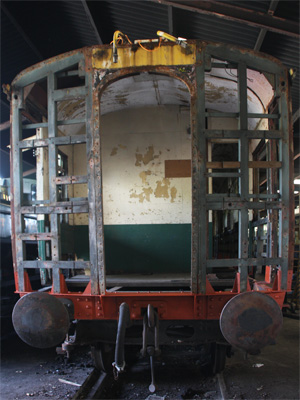
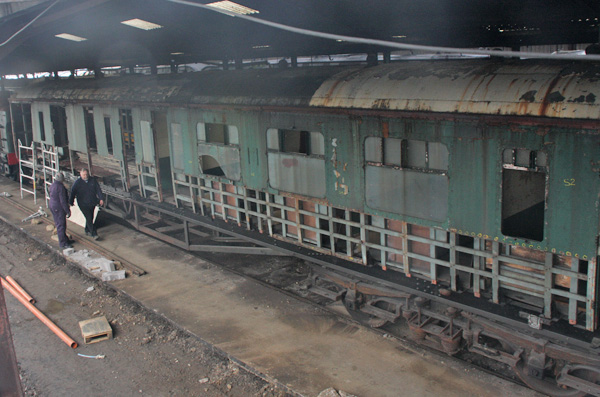
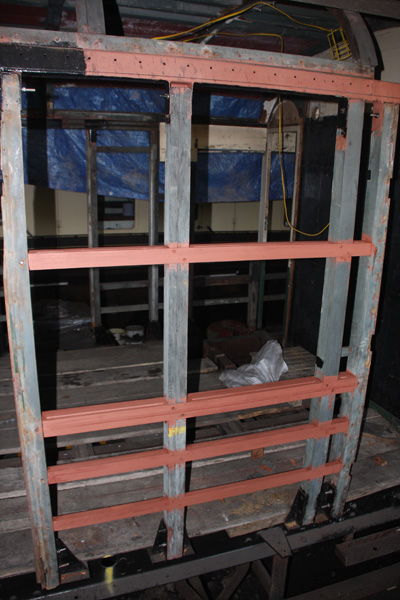
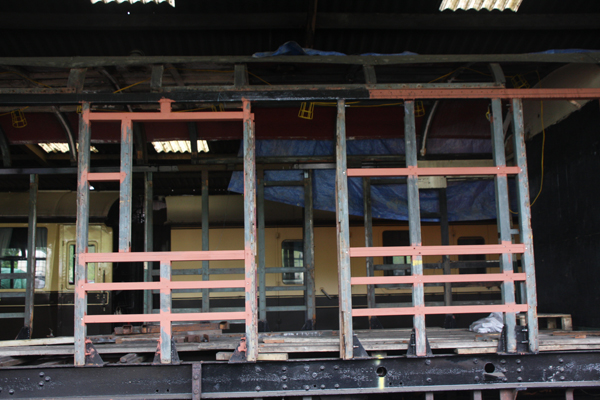
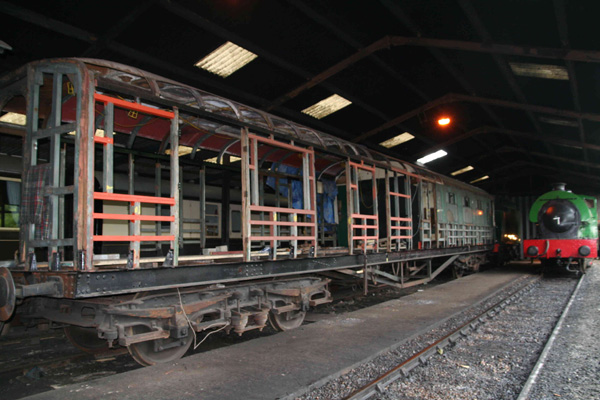
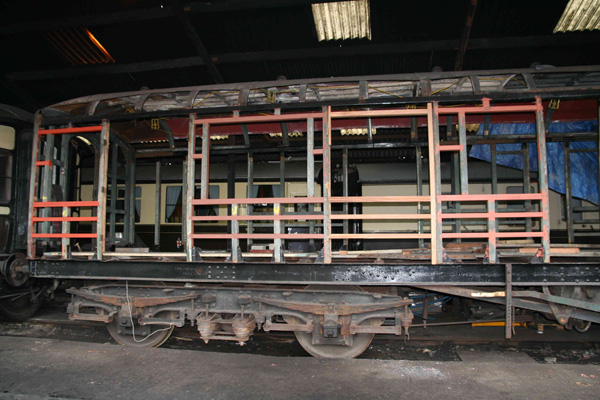
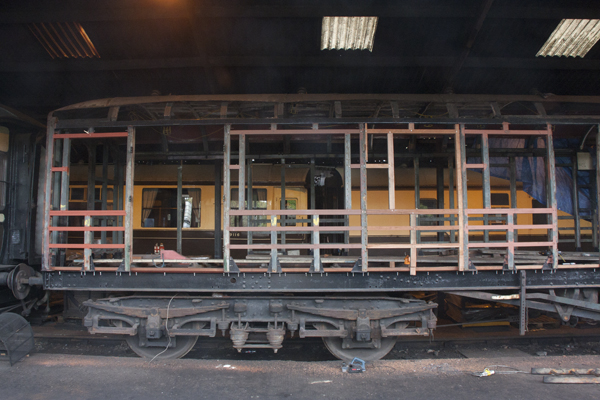
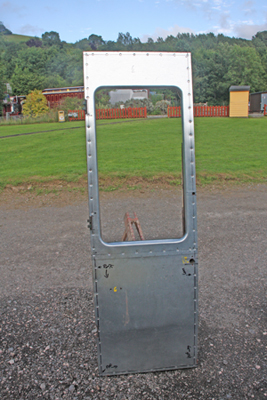
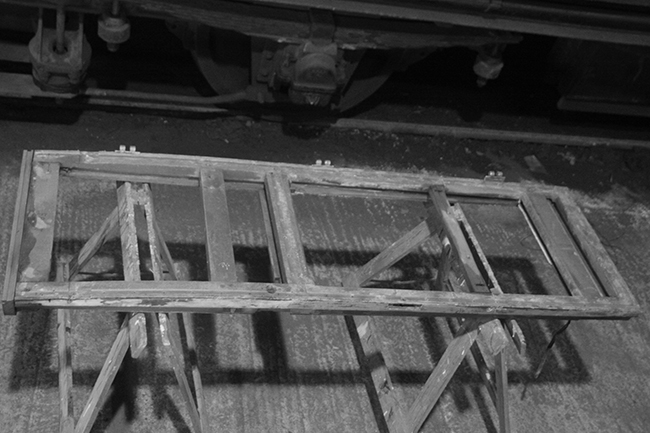
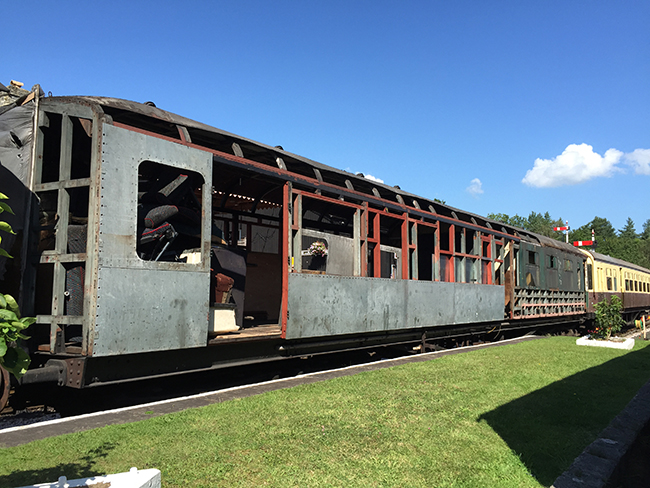
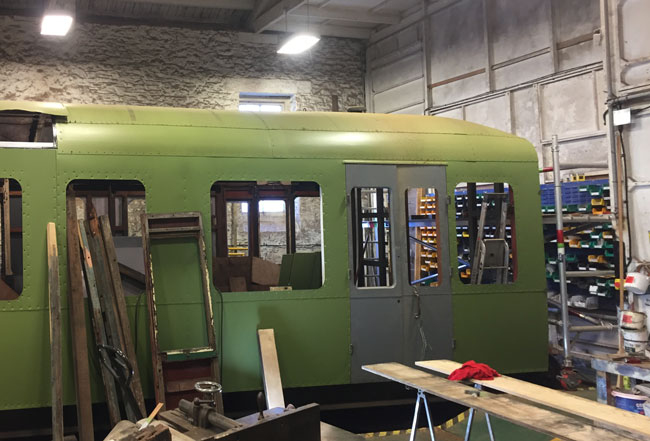
| W2180 before restoration |
This coach was built for British Railways (Western Region)
in 1950 by Metropolitan-Cammel Carriage and Wagon Co. Ltd to a Hawksworth
design.
It was converted for work on permanent way trains by
the gutting of the guards compartment and luggage area to form a galley
and dining room. One of the compartments became a boiler room and
the rest sleeping accommodation.
It was rescued from Cardiff by a private buyer who took
it to the West Somerset Railway with the intention of restoring it to a
fictitious composite layout giving 64 third class seats. Unfortunately
he was unable to complete the task and offered 2180 for sale. Being
of GWR design and reasonably sound it was purchased by a London Group member for the Trust. Now 276
is in traffic (though not completely finished) this is the next London
Group project, though the speed of restoration will depend on funding.
There has been an interlude where GWR Covered Goods 95979
was rebuilt to be a stores vehicle for this project.
The current proposal is to rebuild it as a GWR Buffet,
since we already have enough brake coaches and no GWR refreshment coach.
When complete 2180 will form part of the Great Western
train with 6515, two "Excursion Coaches"
1285
& 1295, Hawksworth First/Third Brake 7377,
Brake Third 1645,
Full Brake 276 and Ocean Saloons 9111 "King George" and 9116 "Duchess of York".
August 2007
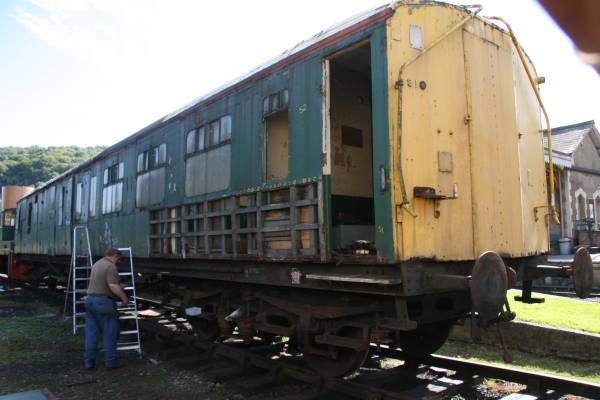
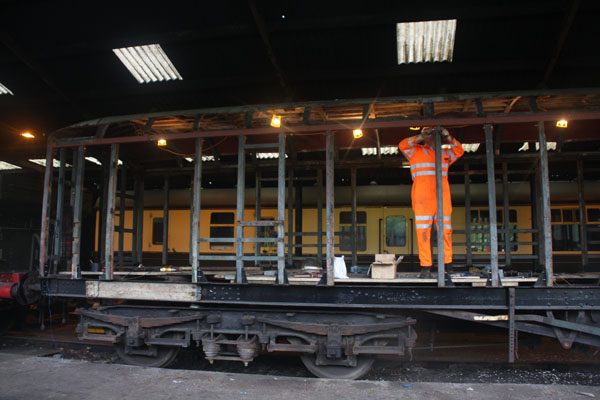
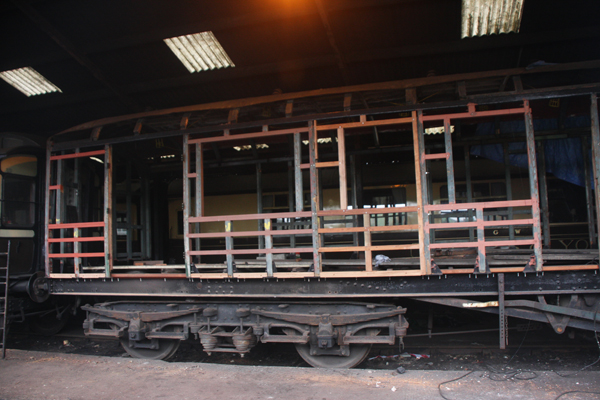
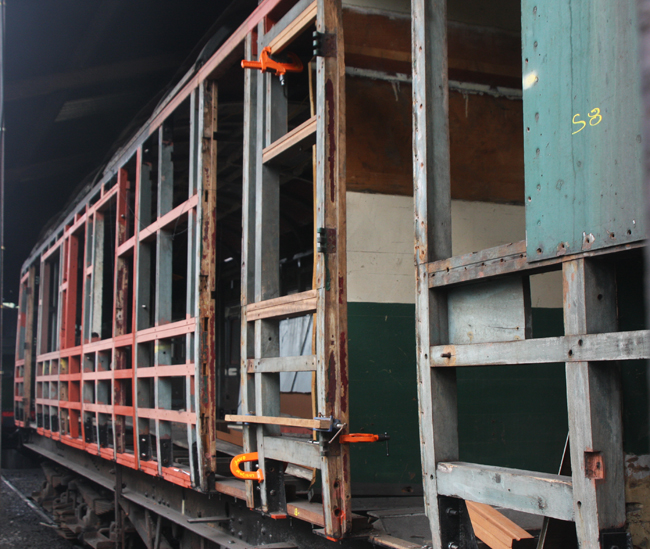
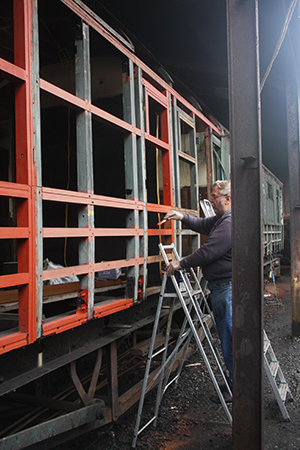
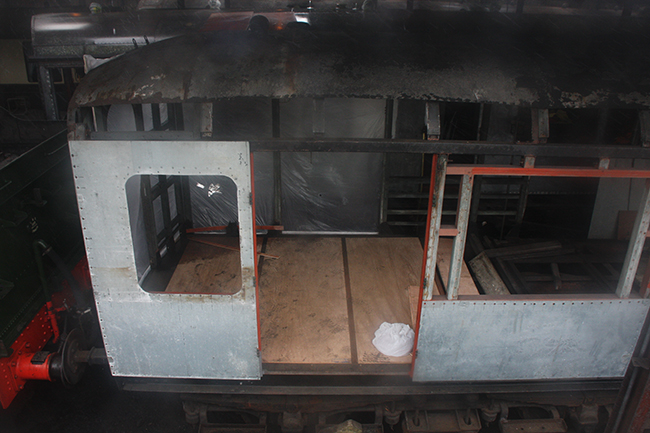
Work on the restoration of 2180 has finally started!
Whilst the coach is general in pretty good condition
we do have to totally reskin it. Unlike 276 2180 doesn't appear to
have been reskined in the past or if it has then the original screw holes
were used. We too will be reusing the old holes except along the
bottom where the screws have failed totally. The sheets will have
the screws in the correct place because we're going to replace the bottom
wooden infill. There is only one reason for this; ROT!
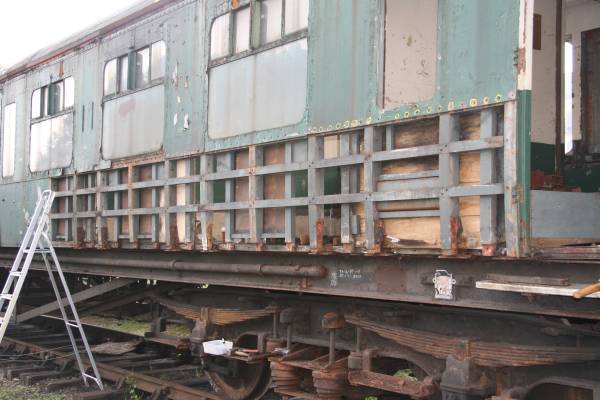
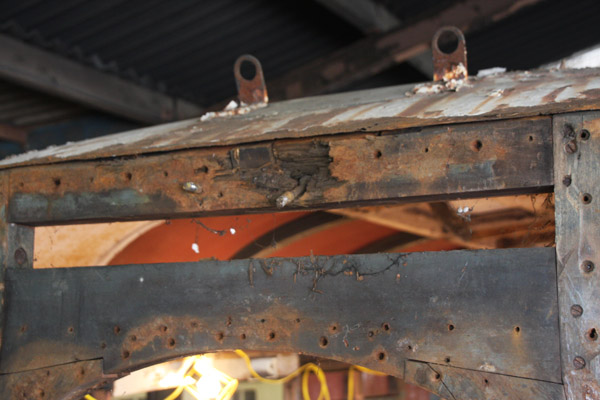
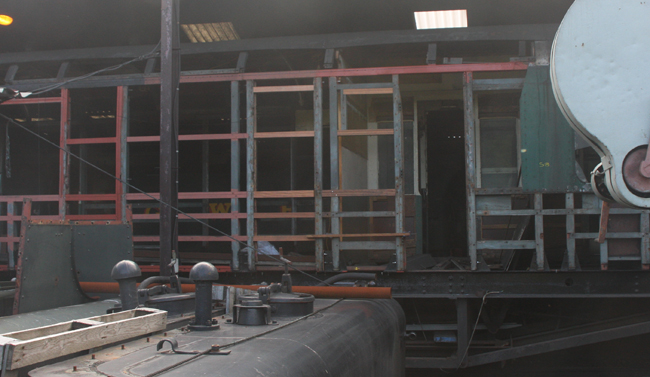
Water has run down inside the panelling and completely
rotted away the steel fixings for the wooden verticals. Unlike 276
all the bolts have punched out of the wood because they haven't rotted
however they are no longer holding the body to the chassis.
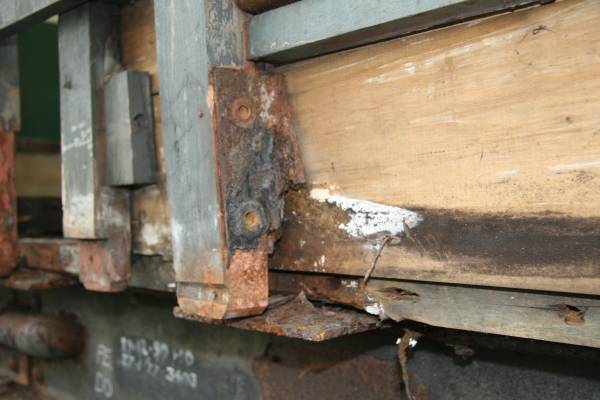
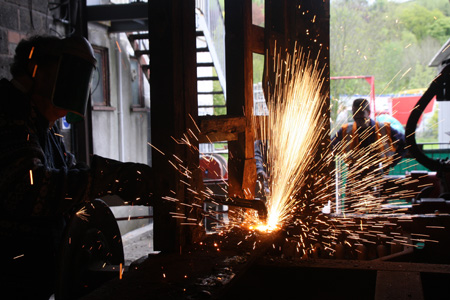
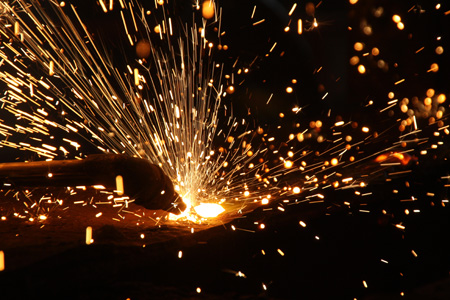
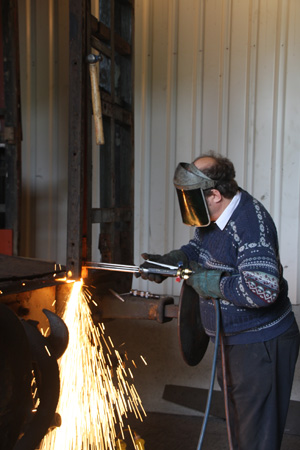
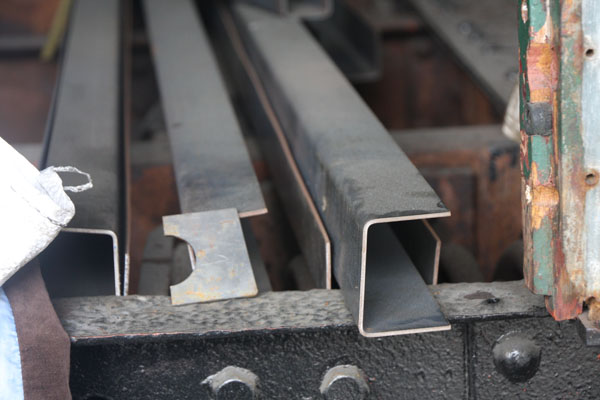
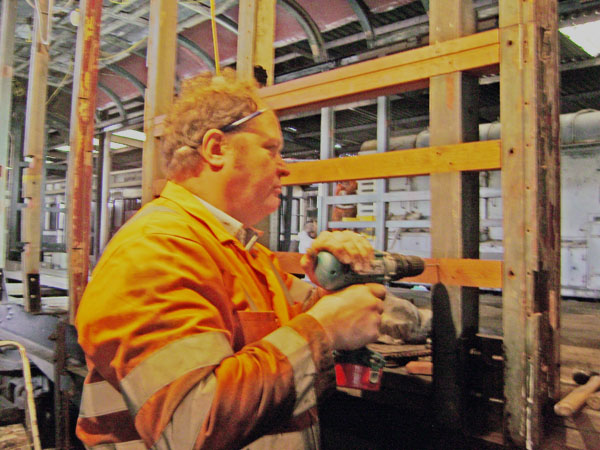
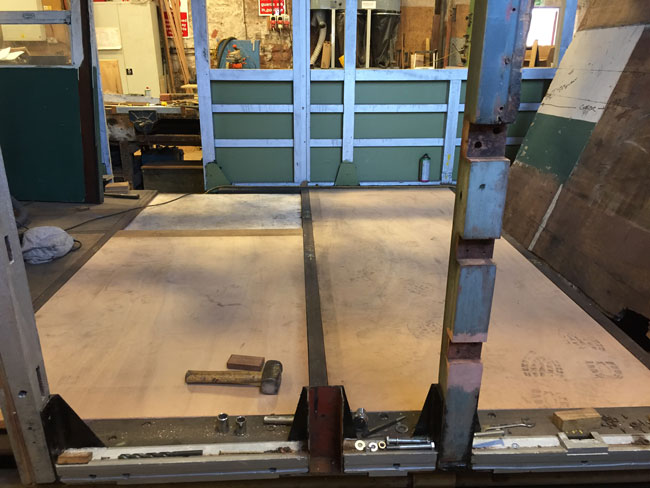
We are going to have to replace these items totally which
means blowing off the old plates and riveting on new ones. This is
a new skill for coach work having previously been limited to locomotives
and will mean assisting the main workshop staff in the task. Once
done they should last for at least another 60 years.
 |
|
|
|
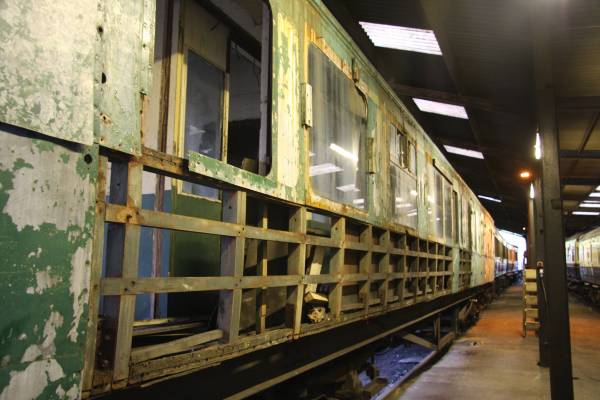
©GRB 2007 |
 |
|
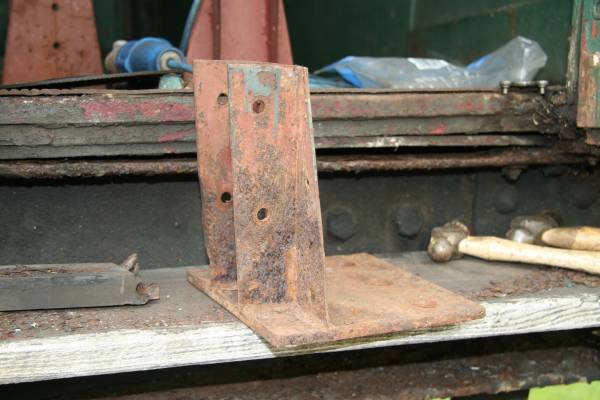
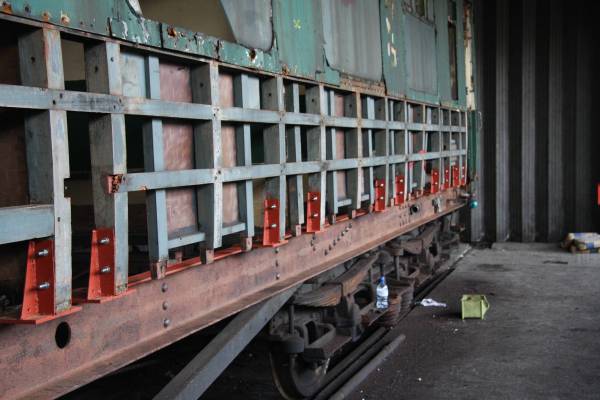
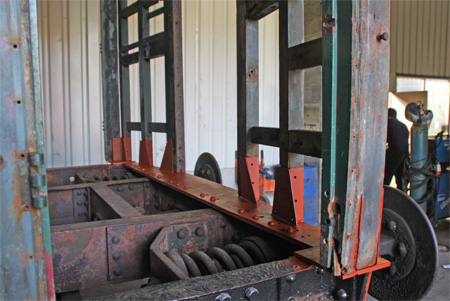
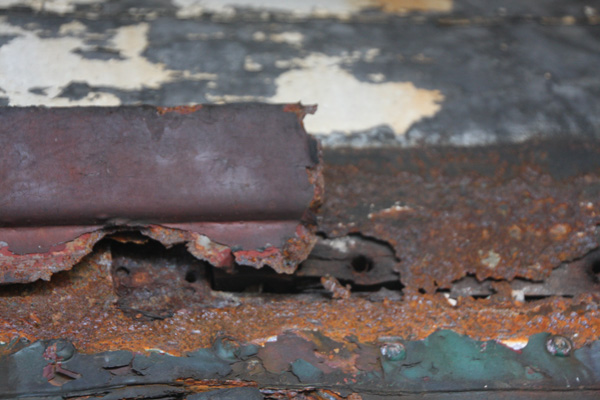
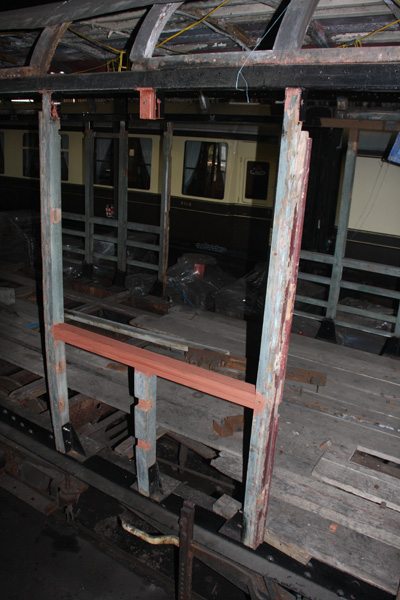
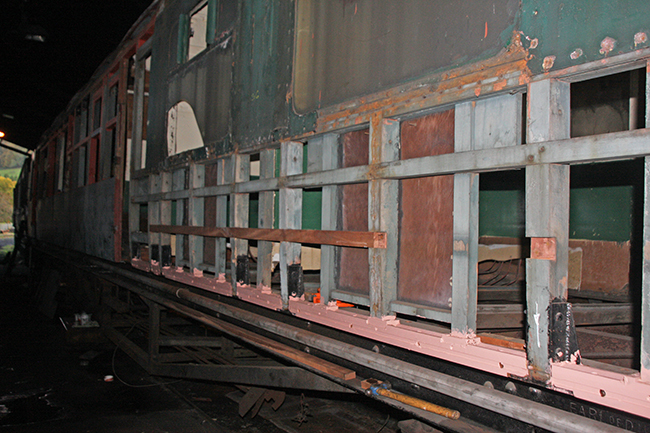
| The extent of the corrosion is disturbing but very local. The wood is sound. | ©GRB 2007 |
 |
|
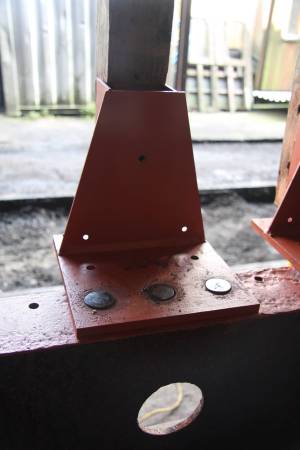
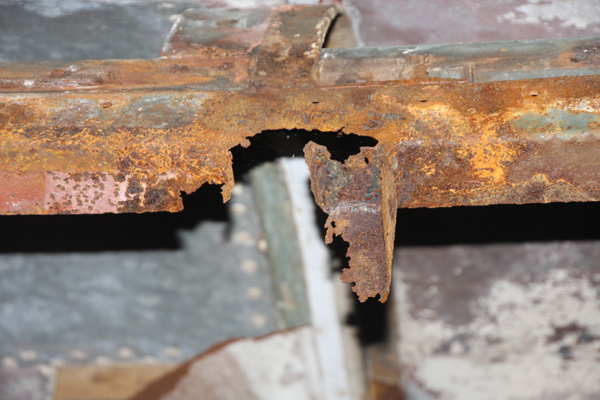
| Detail of corrosion; steel on wood should be welded to plate on chassis! | ©GRB 2007 |
 |
|
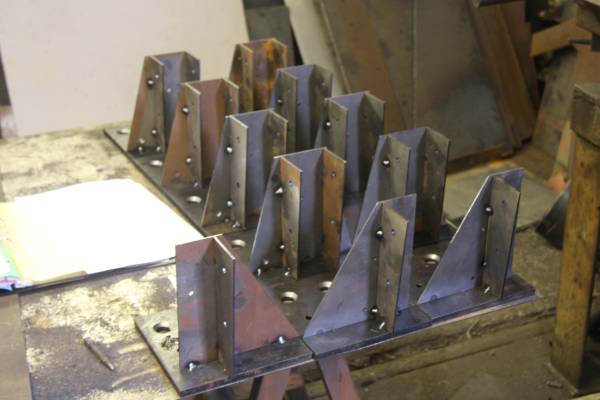
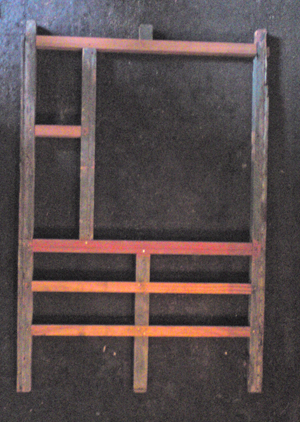
| What the bracket should look like; only need to make 50 new ones. | ©GRB 2007 |
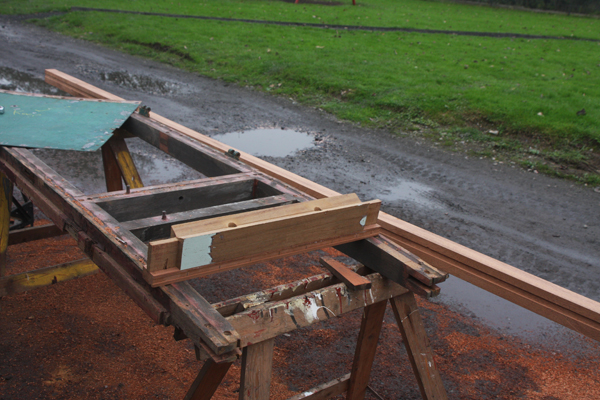
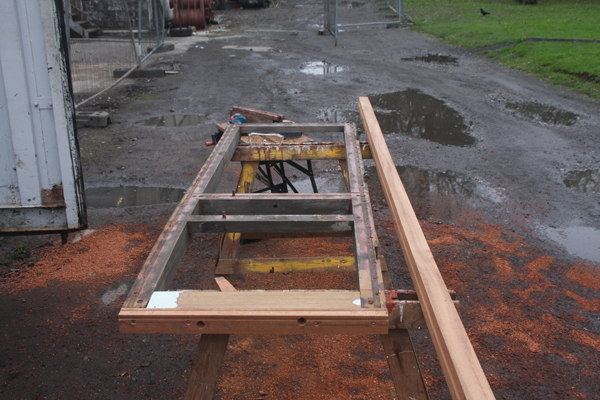
September 2008
Work on the new brackets has at last started and the
first batch was assembled over the weekend of 14/15 September using a jig
fabricated earlier this year. The first couple of brackets were taken
to the coach to confirm the location of the holes and, given that all was
OK, the rest were made. The brackets were then finish welded and
bolted into position on the coach as a temporary measure.
Having done this the side of the coach no longer moves!
They will be unbolted and painted just prior to riveting
down.
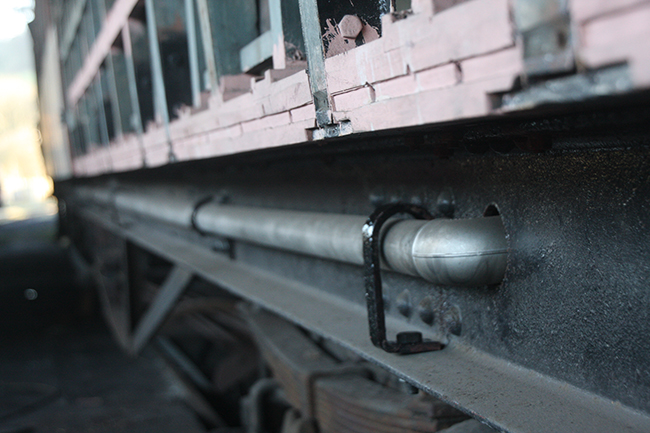
In order to do this the vacuum pipe that runs along the
chassis rail will have to be removed.
|
|
| The batch of brackets are seen here tacked together prior to final welding | ©GRB 2008 |
October 2008
Over the weekend 11/12/13 October 2008 the brackets we'd
made earlier were painted and the chassis needle gunned to remove the old paint and any scale and then painted in
preparation for riveting.
Below there are two short videos of the process. Note: These take a little while to download and are noisy; we wore ear defenders!
This half of the coach is now properly attached to the chassis
for the first time in many years.
Since W2180 is currently stabled next to the workshop
it has been decided to complete the riveting so the Ashburton end of the
river side of the coach has now been stripped of its lower panels in readiness
for our November working weekend when these brackets will be exposed and, hopefully, removed.
We'll then do the Ashburton end of the coach so the whole
end is complete.
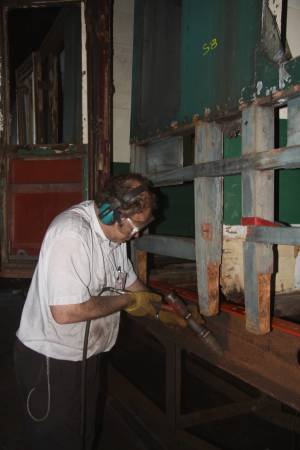 | |
| Needle gunning the chassis to remove scale and years of old paint | ©GRB 2008 |
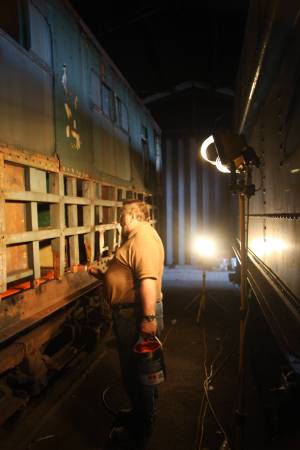 | |
| Painting the prepared top edge of chassis prior to riveting | ©GRB 2008 |
|
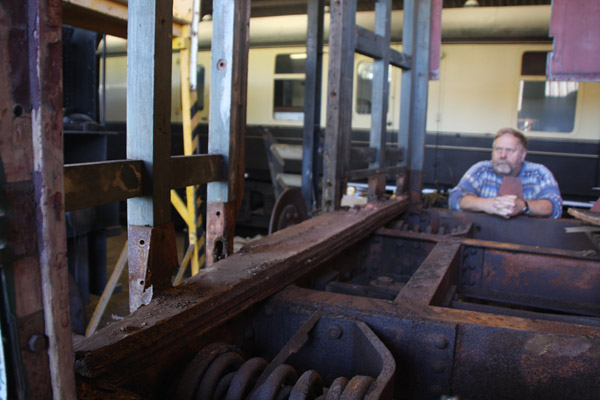
Members of the London Group, assisted by the "Sunday Gang" rivet
the new brackets into place Sunday 12th October 2008 |
©John Keohane |
|
Detail of riveting the new brackets into place Sunday 12th
October 2008 | ©John Keohane |
|
|
| One of the new brackets riveted into place | ©GRB 2008 |
|
|
| ©GRB 2008 | |
|
|
| Pete applies primer to the needle gunned chassis (12th October 2008) | ©GRB 2008 |

|
|
| Having cleaned the chassis rails back to bare metal the chassis number is clearly visible | ©ST 2021 |
|
|
| A start has now been made on the River side of the coach with the first
batch of panels removed 13th October 2008 |
©GRB 2008 |
March 2009
16 March 2009
|
|
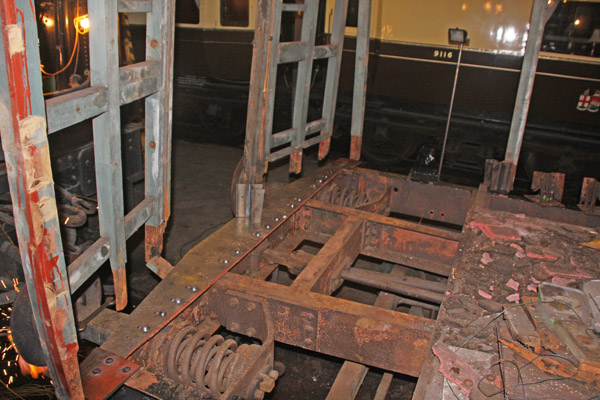
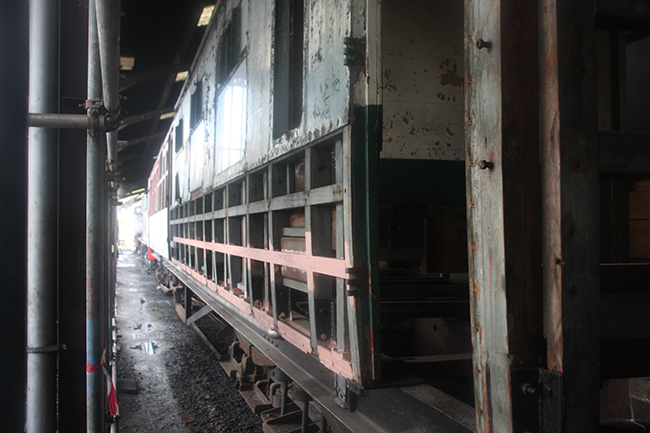
| After fixing the brackets the side of the coach is now nice and straight. 16th March 2009 |
©GRB 2009 |
7 May 2009
Following working on the Thomas weekend we heve spent the rest of the week changing the extension plate at the Ashburton end of the coach.
This plate is as badly corroded as the side brackets but supports four of the six verticals so the entire end cladding had to be removed. This allowed the composite verticals to be dismantled so the securing bolts could be punched out.
The new plate has been delivered profiled and predrilled only requiring us to weld on the brackets.
The corner posts have their own brackets which are specials and have been fabricated by the SDR Works. Due to the cramped conditions the plates were rivetted up first and then the special brackets welded on so the location could be guaranteed.
The end of the coach body only requires new bolts and more paint before we can consider replating.
|
|
|
|
| Removing the rivets that hold the extension plate to the buffer beam. 7th May 2009 |
©GRB 2009 |
|
|
| Separating the extension plate from the corridor support brackets. 7th May 2009 |
©GRB 2009 |
|
|
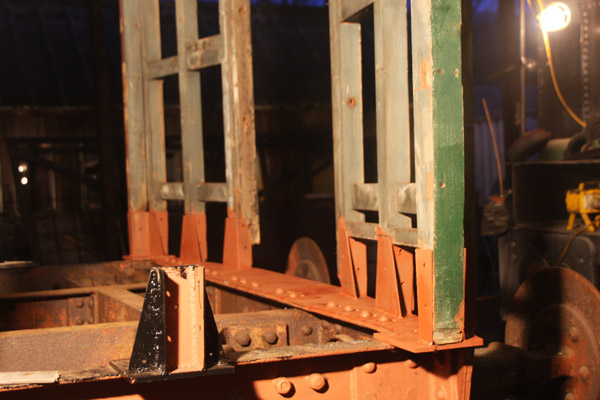
| The Ashburton end framework attached to new brackets. 10th May 2009 |
©GRB 2009 |
|
|
| New extension plate & corner support brackets rivetted into place. 10th May 2009 |
©GRB 2009 |
Over the AGM weekend we continued to strip down the Staverton side of the coach so we have now cleared the entire chassis rail on this side.
Some of the posts had been repositioned by the previous owner so we removed those we could along with all the original brackets which we'll be replacing next time.
We will be re-instating the posts to their original locations though we are reducing the number of doors as part of the change of use for the coach.

|
|
| The Staverton side now has no lower panels. 29th May 2009 |
©GRB 2009 |
|
|
| Despite the noise and dust we had some pretty visitors. 29th May 2009 |
©GRB 2009 |
We have now completed the rivetting of the brackets on the Staverton side of the coach and started on the remaining section of the Buckfastleigh side.
Some of the verticals have been bolted back but a damaged door post needs to be replaced first.
We have now completed the rivetting of the brackets on the Buckfastleigh side so only have the Totnes vestibule left to do.
We are optomistically hoping to complete this at our November working weekend so 2010 will see us removing the roof and repairing the side post top brackets.
Once we've done these we will be able to complete the framework repairs in readiness for the panelling.
|
|
| The end of the heavy riveting is in sight; just this end to do!
12th October 2009 |
©GRB 2009 |
|
|
| Fortunately the rotten wood is minimal however this gangway head will need replacing. 12th October 2009 |
©GRB 2009 |
|
|
| Totnes vestibule with all plates riveted down, just awaiting the welding of the brackets.
22nd November 2009 |
©GRB 2009 |
|
|
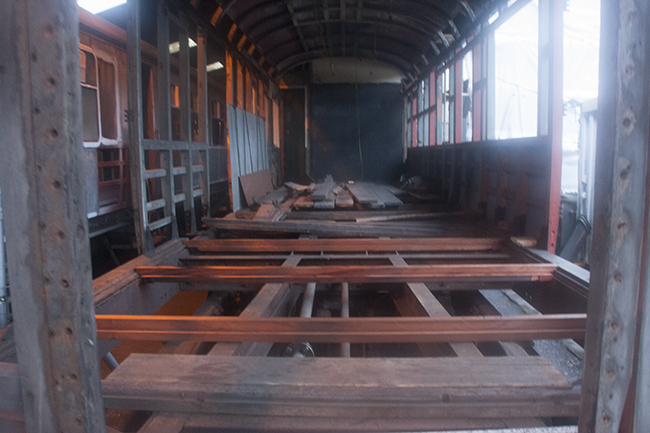
| The end of the structural riveting - now to replace the rotten woodwork and a new floor.
22nd November 2009 |
©GRB 2009 |
|
|
| Sometime in W2180's past this bufferhead got dented so it's now been straightened out
and looks a lot better. 22nd November 2009 |
©GRB 2009 |
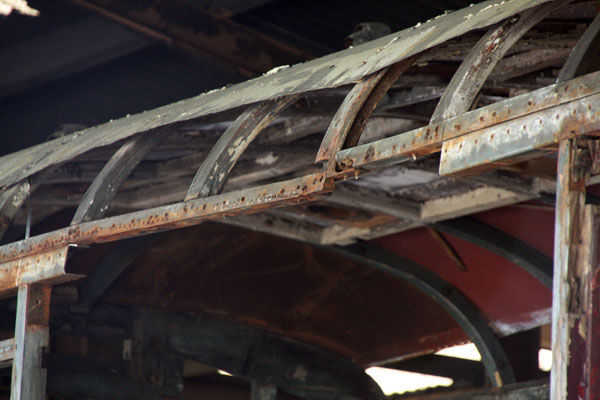
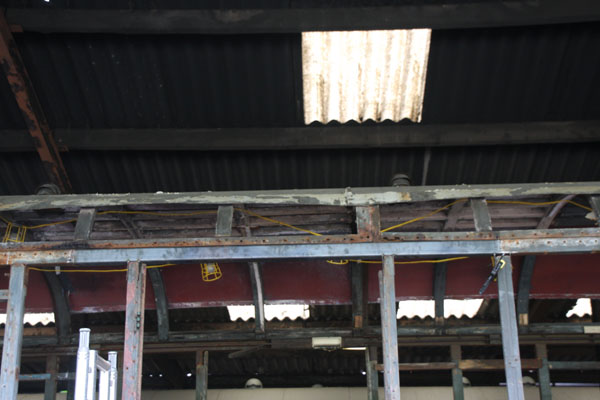
The new season has started with work moving up the coach to the roof.
All Hawksworth coaches have a fundemental fault with the gutter design where ash and other debris lodges in the joint at the bottom and corrodes in both directions eventually piecing the roof causing it to leak as can seen from below.
Depending on cost we may replace the lower edge with stainless steel since the rest of the roof is generally sound. The normal repair is obvious but even this had been repaired on 2180!.
Now the cant rail has been exposed it is clearer how much of it we will need to replace. The cant rail is a special section so we will be making the replacement in-house.
|
|
| Preparing the site for the weekend's work. | ©GRB 2010 |
|
|
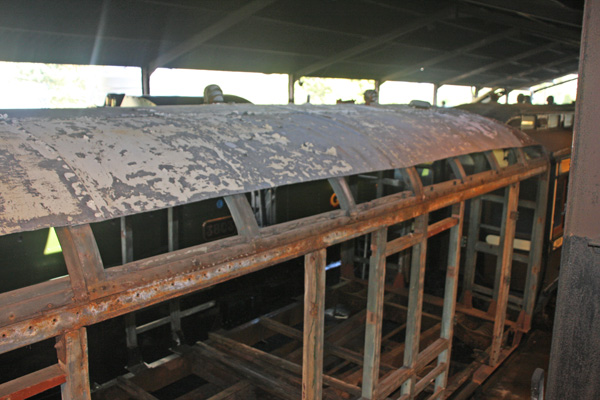
| The gutters and roof have seen much better days! | ©GRB 2010 |
Following a small delay whilst we had the floor professionally removed we have been able to continue with removing the gutter and roof repair panels from the Buckfastleigh side Totnes end (the old luggage area).
As can be seen from the pictures below we're nearing the point where we can start to replace the steel cant rail. A local steel supplier (the Plymouth Metal Centre) has recently acquired a suitable press and so can fold up the section in 2.5 or 3m lengths which will make our lives a lot easier.
Next time should see at least one of the rails in place.
|
|
| The roof exposed following removal of the gutter and lower roof sections. | ©GRB 2010 |
|
|
| Extent of corrosion to cant rail is clearly visible here. The remains of a post mount can be seen too. |
©GRB 2010 |
As stated above we were going to make the new cant rails in-house but the Plymouth Metal Centre, a local steel supplier, has made the sections for us in 2.5 metre long runs instead of the single metre lengths we can make in house so fewer welds!
Looking at the pictures below the first of the cant rail repairs can be seen.
|
|
| The replacement cant rail sections & stiffeners awaiting fitting. | ©GRB 2010 |
|
|
| Rotten cant rail section, shewn in April, removed ready for the replacement. | ©GRB 2010 |
|
|
| Replacement cant rail welded into position and timbers fitted temporarily. | ©GRB 2010 |
|
|
| Most of the vertical timbers have been fitted temporarily in their correct positions. | ©GRB 2010 |
Work has started again on 2180 though we were delayed because we got involved in putting the Mansell wheels back together!
We basically completed the machining and fitting of the first three longitudinal frame bars. We have now worked out how we're going to fill in the unwanted doors in a sympathetic fashion and we have ordered the timbers machined to profile so the rest of the framing should be affected quite quickly.
|
|
| The first of the replacement frames are fixed into place. | ©JK 2011 |
|
|
| The first of the replacement frames completed. | ©GRB 2011 |
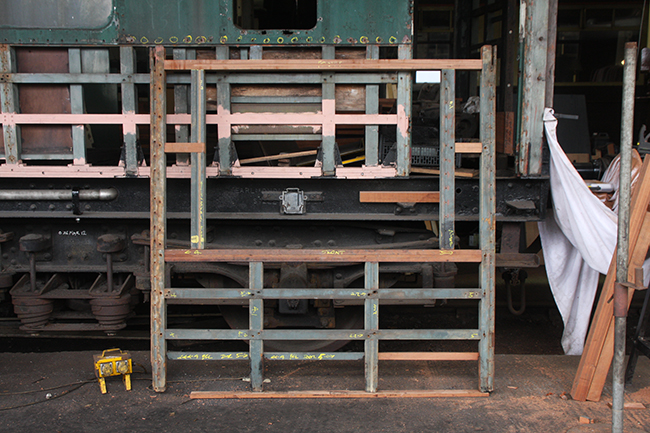
Following the test fitting of the lower frames as detailed above we made the upper horizontal bar and, to save on machining, moved a post from the next panel down because it had to cut for the new window.
A start has been made on the next frame along by shortening the centre post to make way for the new window. The remains of the post will be used to support the cladding next to the window.
|
|
| The first vertical to be moved for a new windows. | ©GRB 2011 |
|
|
| Rebuilt frame, with new window, laid out ready for mounting on the coach. Note displaced centre section of the middle post. |
©GRB 2011 |
|
|
| The rebuilt frame, with new window, mounted on the coach. Note displaced centre section of the middle post in left hand panel. |
©GRB 2011 |
July 2011
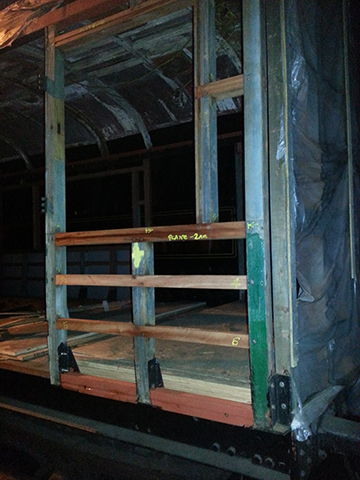
All the Staverton side frames for the former luggage compartment have been repaired and the first of the door infills has been started. It still lacks the centre and window supports.
These will be fashioned from the doors dismantled by the previous owner for this purpose.
The first of the infill pieces for the bottom of the side sheets have been test machined i.e. a prototype set has been constructed. It is hoped that more of these can be fashioned and installed later this year.
|
|
|
|
| All the Staverton side luggage frames have been rebuilt & the first door infill started. | ©PBC 2011 |
October 2011
The first of the floor side timbers are now in place and are ready to be fixed to the post frames and these will allow the lower panel infills to be installed.
The first of the double doorway infills has been built and installed leaving just the two singles doors to be infilled.
|
|
| The first of the Staverton side doorways has been infilled. | ©GRB 2011 |
November 2011
As the frame repairs and modifications progress thought is being given to cladding this portion of the coach. The body panel bottom edges are held in place by an infill between the brackets which is fixed to the inner floor outer rail. This infill has been made in 4 metre runs and is then cut to length for invidivual fitting.
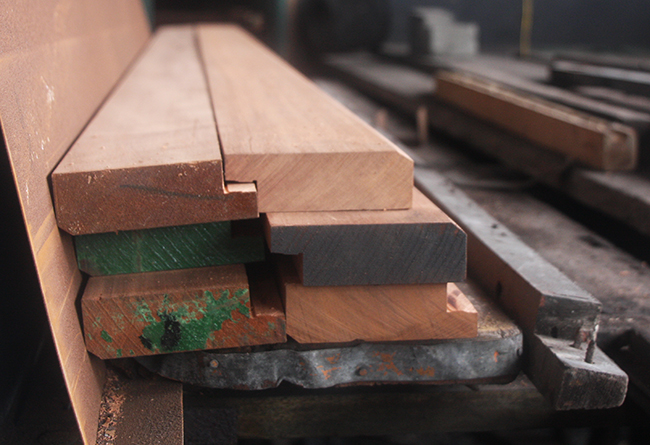
In order to get the floor edge correct the double doors have been recovered from storage and stripped of their old steelwork. One of the doors, number 7, needed a replacement bottom rail and so this has been manufactured from a large hardwood former newel post we have been donated because, like most of the wood on the coach, the blank wasn’t a nice modern size!
|
|
|
|
| Door 7 with its new bottom rail which has been manufactured from a scrap newel post.
The item to the right is the body side panel bottom support infill waiting cutting to length. | ©GRB 2011 |
|
|
| The first of the Staverton side panel bottom infills after being cut to size and fitted. | ©GRB 2011 |
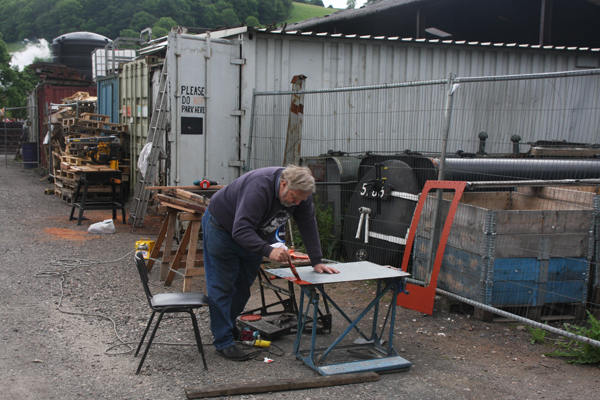
June 2012
Work is progressing slowly with the rebuild and conversion of the former luggage doors from plain panel to ones with a fixed window.
The door skins have been precut by our supplier to size so all we’ve had to do is put in the fixing holes and cut the window apertures. Doesn't sound much work but it actually takes quite a bit of time!
The fixing holes have been punched into place with a hydraulic press set up to press the screw countersink and then punch the hole. This beats the previous method of drilling each individual holes and then pressing the countersinks using an old fly-press
The door frame itself has been lined to produce a frame of standard size ( 18” wide by 36” tall ).
|
|
| Painting one of the lower door panels prior to fitting – note top panel in background. | ©GRB 2012 |
August 2012
Work on the doors has continued following the supply of new door top skins by South Devon Railway Engineering. Interested in new door skins ? then click here
Door 10 has now been reskinned and awaits rehanging though it still needs the interior side refurbishing which will happen when we refit the droplight.
The frame between the cross–corridor and the compartment (i.e. between doors 13 & 14) has been repaired, modified and refitted. The window adjacent to door 14 has been reduced in height to improve the security of the galley in due course. At the moment it still requires some bolts due to the door post requiring repairs at the ends.
|
|
| Door 10 reskinned with new panels | ©GRB 2012 |
|
|
|
|
| Carriage side panel refitted & cross corridor infill bars test fitted.. | ©GRB 2012 |
October 2012
The cross corridor infill panel has now been built and fitted. Given that the servery will be the other side of this wall a small window has been built to introduce light whilst maintaining security. Servers can also look out to see where they are when standing!
|
|
|
|
|
| Cross corridor infill built and fitted; note reduced size window. | ©GRB 2012 |
February 2013
The 25th February was an auspicious day in that we fitted the first replacement external panel – it’s only been 6 years as can be seen from this page.
|
|
| Galley emergency exit, Door 14, rebuilt with reduced size window. | ©GRB 2013 |
|
|
| The first new panel. | ©PBC 2013 |
April 2013
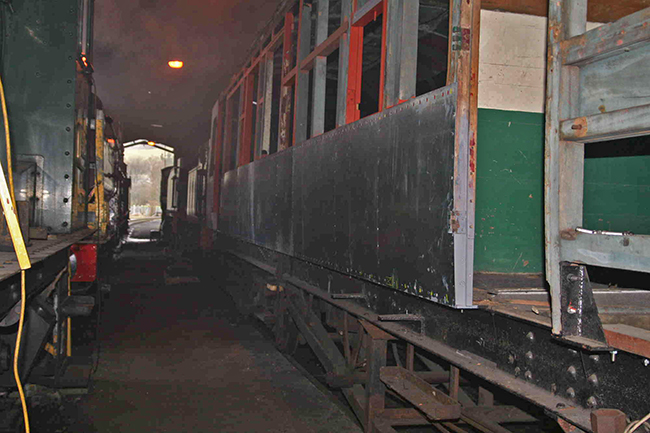
Having fitted the first panel to the Staverton side we got the balance of the lower panels fitted to the rebuilt half of the coach.
|
|
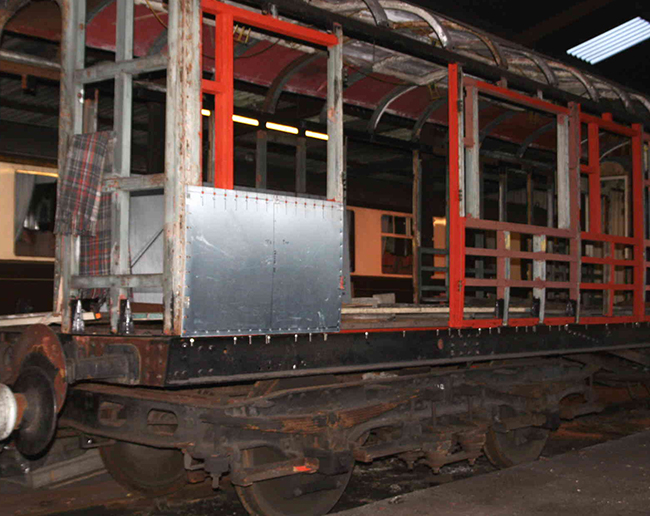
| Half of one side now has new panels. | ©PBC 2013 |
|
|
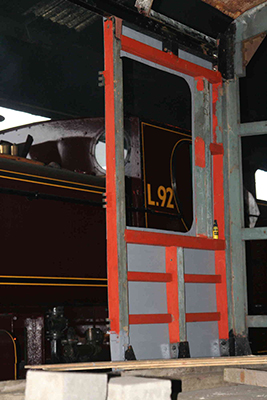
| Another view new panels but from the other side. Note: L.92 . | ©PBC 2013 |
August 2013
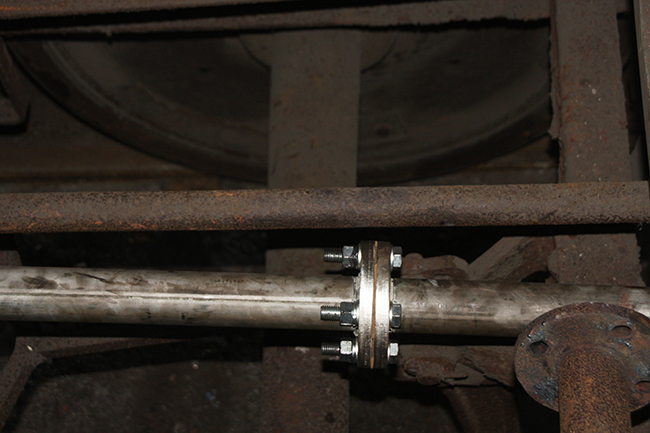
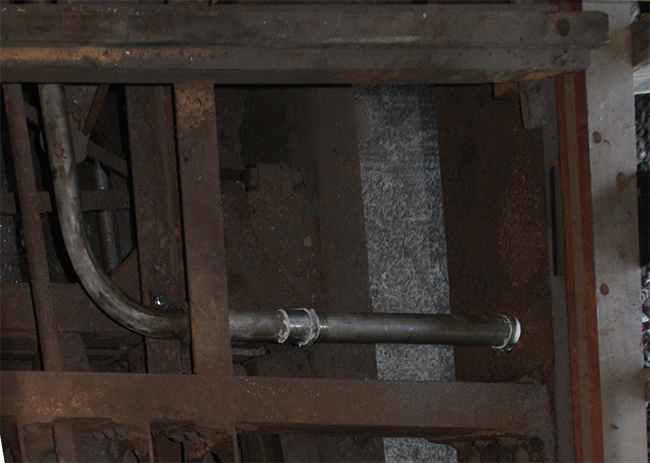
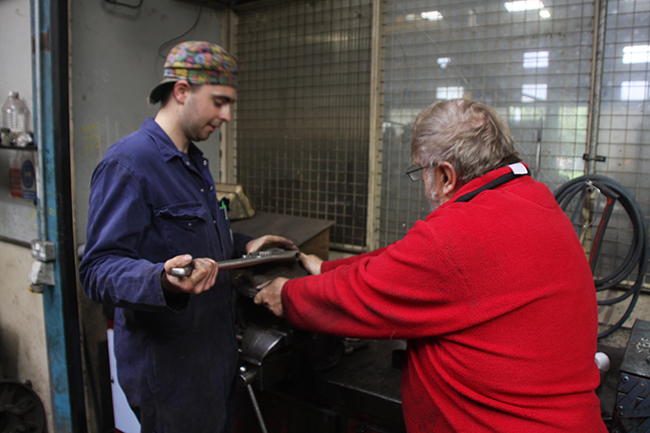
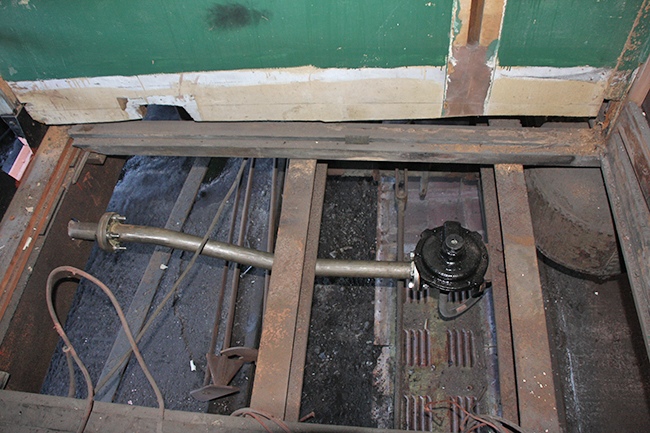
When we prepared the chassis for the riveting we had to remove the vacuum pipe from the Staverton side chassis rail. Over the August Bank Holiday weekend this was replaced with new stainless steel tubing and fittings. The flanges were made specially for us by the Plymouth Metal Centre and machined by South Devon Railway Engineering. The entire vacuum pipe has been replaced from one end to the other. Next time we will bend up the links to the direct admission (DA) valves which themselves still need servicing.

| |
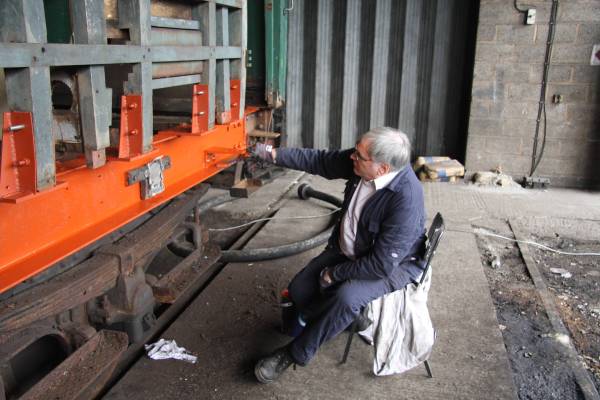
| Nick Davies of SDRE fettles one of the new vacuum pipes. | ©GRB 2013 |
| |
|
|
| The new vacuum pipe with flange joint (top) and connection to main pipe. | ©GRB 2013 |
October 2013
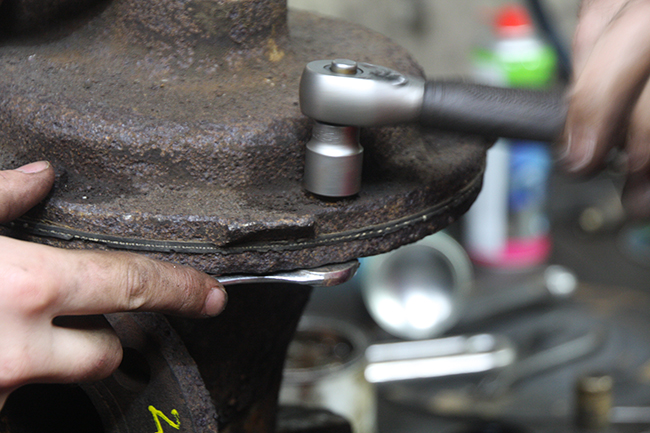
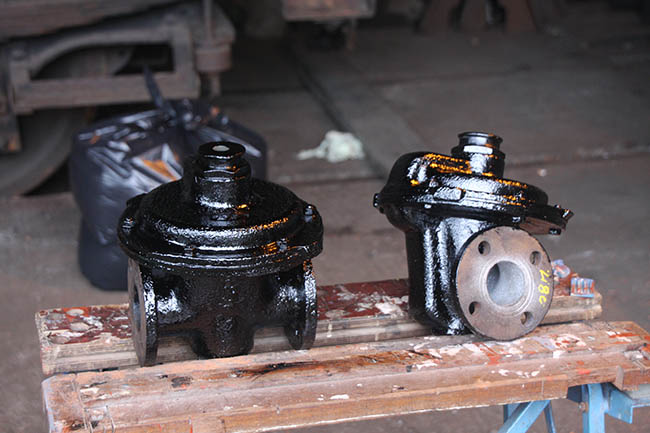
In order to apply the brakes evenly along the train there are local “direct admission” (DA) valves. These detect the change in the vacuum pipe pressure and then admit atmosphere directly into the vacuum cylinders thereby applying the brakes (see our FAQ on vacuum brakes for more details).
The vacuum brake system on W2180 appears to have been last serviced in 1965 because that is the date on the DA diaphram and link hose.
The diaphram and seals were replaced with new components so the DA valves can be refitted to the coach. This will happen once the last pair of flanges have been machined up.
We still have the vacuum cylinders themselves to service which may result in them being changed to the more modern rolling ring type.
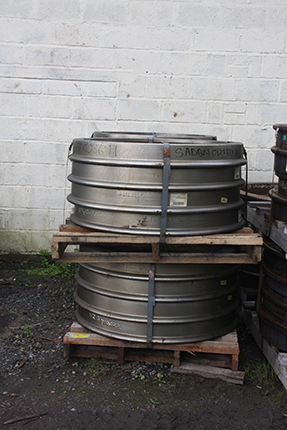
Also the new tyres for W2180 have arrived as part of a batch of GWR coach tyres. Fitting will have to wait for a time slot in the SDRE Works.
| |
| Steve Trenouth and John Keohane dismantle a GWR DA Valve. | ©GRB 2013 |
| |
| It is nearly 50 years since these bolts were last undone.. | ©GRB 2013 |
| |
| Vacuum brake DA valves ready for re-installation. | ©GRB 2013 |
| |
| The full set of new tyres for W2180 has arrived.... | ©GRB 2013 |
November 2013
Having had the last two flanges machined the pipes we’d prepared for the Direct Admission (DA) valves could be assembled and the DA valves refitted to W2180.
We re-instated the old link hoses to the vacuum cylinders to keep the dirt out until the cylinders themselves can be serviced or replaced. Our cylinders are the older IR band type rather than the prefered rolling ring version. (see our “How it works” for more information ). Apparently these hoses only have a life of 5 years which is why we haven’t fitted new ones – the present ones are dated 1965 !
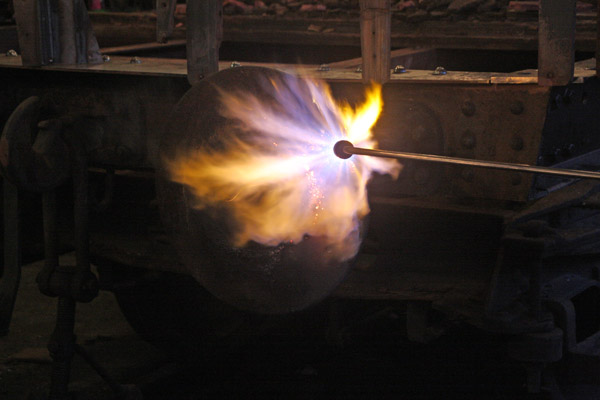
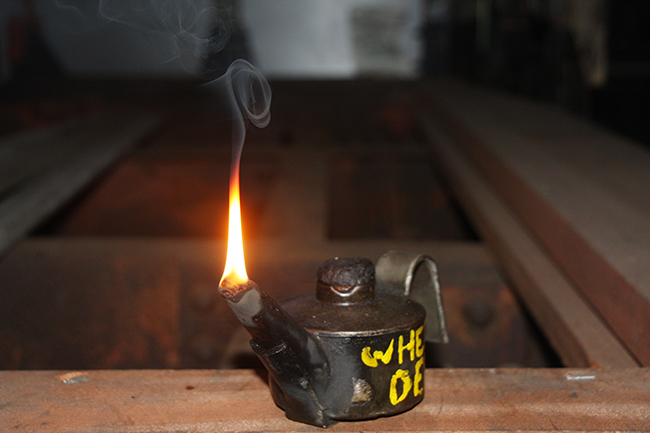
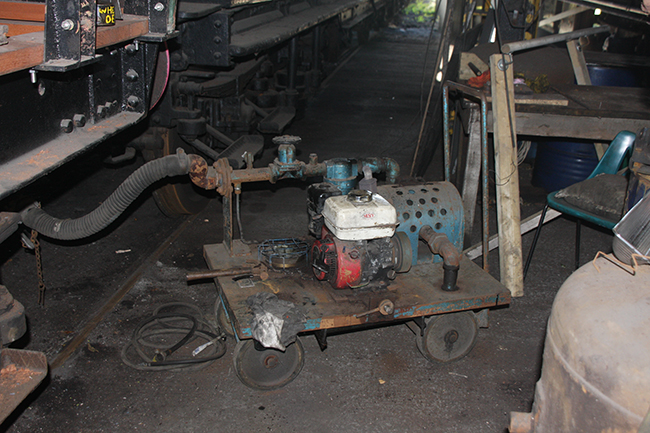
About a decade ago we were donated a petrol driven vacuum exhauster which had been built for testing the vacuum brakes of wagons in-situ and it has been used ever since when vacuum cylinders are rebuilt. Just to check we had no leaks we connected it up and achieved 16 inches of vacuum; a far cry from the BR 21” or the GWR 26” but a vacuum never the less. The inability to get a higher vacuum was not a leak in our new piping – as tested with the flare lamp – however even though the pistons can be rattled up and down with a bar they do not rise so we suspect the rings are frozen to the cylinders.
Back on the body we have removed the lower stringer which had rotted at a few joints and are in the process of its replacement; the first new section can be seen in the photographs. We intend to use the the good bits of the old stringer to repair the larger one above where it has suffered in the joints. With this we are approaching the end of the framing repairs for this side of the coach.
| |
| A flare lamp – sometimes the old ways are still the best.... | ©GRB 2013 |
| |
| One of the restored DA valves back in place | ©GRB 2013 |
| |
| Some years ago we were donated this vacuum exhauster.... | ©GRB 2013 |
| |
| The rotten stringer is being replaced. | ©GRB 2013 |
April 2014
The side rail has been replaced in readiness for the new steel sheets however these will have to wait for the repairs to the next stringer up and the window lower bar to be repaired.
The running shed in which we are located is due to be demolished to make way for a new carriage and wagon workshop so we will need to improve the weather resistance of the coach.
Since the steel cladding is effectively clinker built it is likely we will trim the bottom off the top sheets so the new lower panes can be fitted whilst the top sheets are still in place.
We’re holding off for as long as possible to reduce the damage that would inevitably happen to unpainted sheets.
Three of the floor joists have been refitted into their new pockets. The balance will be done in due course but the the joists themselves have been cut ready.
The floor used to be made of hardwood planks topped with an asbestos rich “cement”. This has been professionally removed along with the planks so we are replacing them with two layers of plywood. The lower layer is 18mm fireproof plywood and the upper layer is 22mm Lloyds grade BS1088 marine plywood. The final floor covering will be some form of hard wearing linolium.
| |
| Replacement stringer installed and painted | |
| |
| New floor joists ready for the new floor boards | |
| |
| New floor boards in place – note the first piece of rubbish has “arrived” ! | |
| |
| Timber machined up ready for the floor edging.. | ©GRB 2014 |
November 2014
The Totnes end, Buckfastleigh side panel has now been rebuilt with medum sized window aperture as per the Staverton side.
| |
| The rebuilt side panel –see floor picture above for corresponding Staverton panel | ©GRB 2014 |
March 2015
Over our first 2015 working party the second Buckfastleigh side luggage compartment frame was modified to have a standard 4foot by 3foot window instead of the previous 16inch wide plain window.
Whilst rummaging in our stores looking for something else we have found the vacuum pipe fixing brackets – these have been cleaned up, repainted and refitted to the coach.
| |
| Rebuilt Buckfastleigh side luggage compartment frame | |
| |
| The Vacuum Pipe is finally fixed in place – albeit that the “J” bracket is back-to-front... | ©GRB 2015 |
August 2015
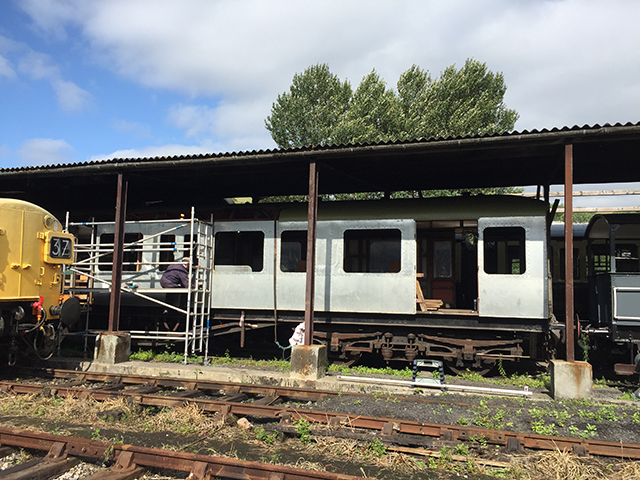
| |
| W2180 basks in the sun during a shunt to put LNER A4 60009 into the workshop
The next panel ready for fitting can be seen in the former luggage space. |
|
| ©GRB 2015 | |
May 2016
| |
| |
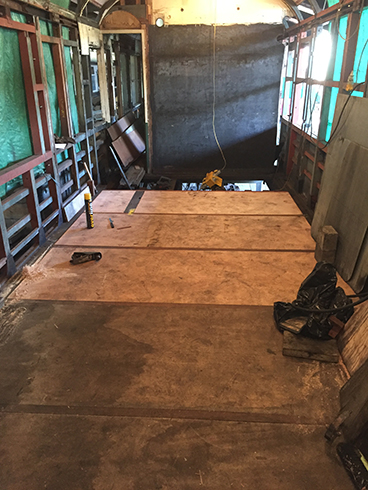
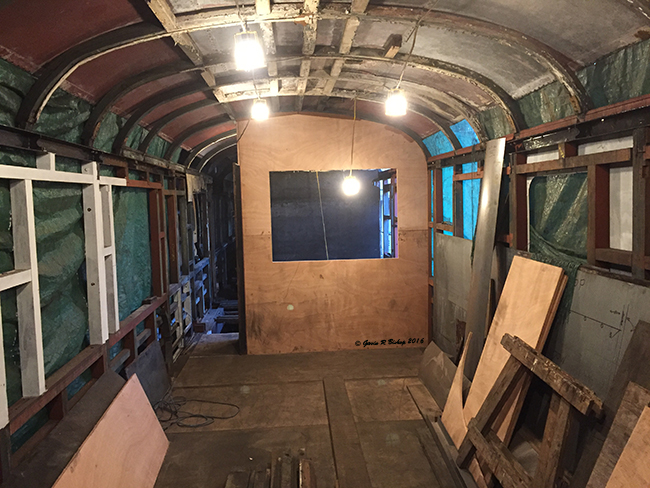
| The new flooring going down | |
| ©GRB 2016 | |
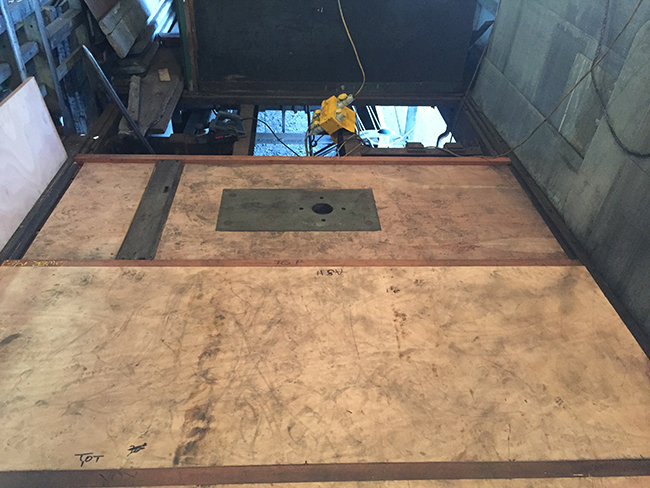
The new luggage/wheelchair area floor is fitted. The bottom, 18mm thick plywood, has been coated in a fire resisting finish. The top 22mm layer will eventually be sanded down and the linolium glued to it.
Note in the upper photograph the old handbrake standard mounting block has been retained and simply build into the floor. This is inside the galley area of the buffet so should make for a more stable floor.
The black line is the timber forming the base of the corridor wall; the counter front will be mounted on the near floor joist.
November 2016
| |
| The new galley bulkhead with serving hatch | |
| ©GRB 2016 | |
The first new bulkhead can be seen in place in the former luggage space. This bulkhead isn’t where Hawksworth designed one to be so the roof hoop has the same centre line as the floor joist making the top fixture more complex.
On the left hand side of the bulkhead is a piece of the original corridor.
March 2017
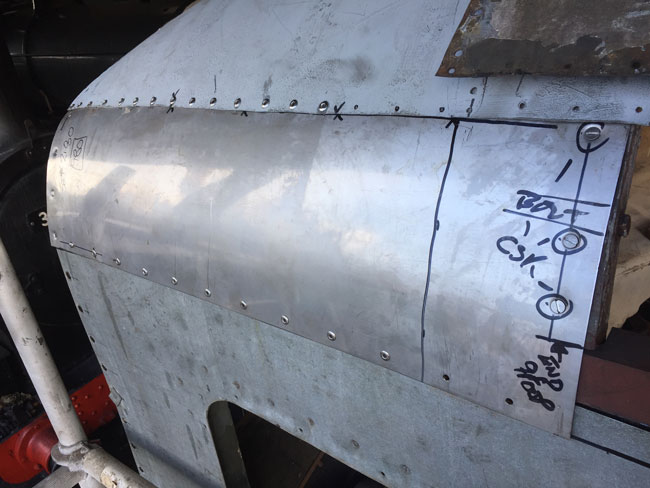
| |
| The first stainless steel roof repair panel fixed in place; the missing rivets are shared with the next panel. | |
| ©GRB 2017 | |
As mentioned seven years ago (!) above in February 2010 Hawksworth rooves have a design fault and corrode through behind the gutters. The lower edge of the original roof was replaced sometime in 2180’s past and these repair panels have gone again. Because water ingress can do so much damage and changing these panels is not a trivial task we have decided to use stanless steel. This worked well on GWR TSO 1295 so South Devon Railway Engineering have bent us up a set for 2180. The picture above shews the first of these fixed in place. The construction is effectively clinker built so we can't fit the next panel until the one beyond is in place. The order is effectively 1,3,2,5,4,etc.
April 2017
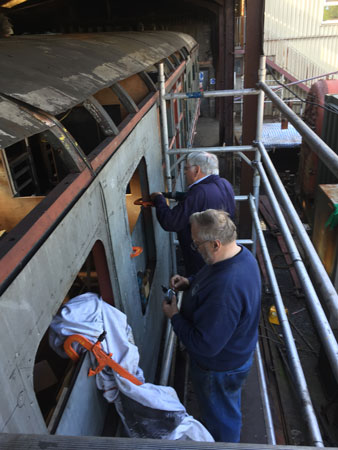
| |
| Peter and John fit the next side sheet to W2180 | |
| ©GRB 2017 | |
Slow prorgress is being made; the penultimate side sheet on the Staverton side, Totnes half of W2180 has now been fitted ( see above ). The sheet to its right has been prepared and will be fitted next time.
Stainless steel roof sheets 3 and 2 ( see March 2017 for numbering ) have now been installed so when the next side sheet is fixed we will be able to fix 5 and 4 meaning we'll be half way along this side.
November 2017
The Totnes half of the Staverton side now has its roof and the galley doorpost on this side has been repaired ready for the door.
The original guard’s step has been relocated to this door to allow emergency egress from the galley following the removal of the Guard’s compartment and the filling of the original doorway. The doorway also has a GWR guard’s long grab handle.
If we can get another one then the Buckfastleigh side will be similarly fitted.
2180 is now to receive some more full time attention so better progress can be made; the carriage is needed by the Railway.
Members of the shed team are currently rebuilding the battery box so this can be re-instated and then the galley floor completed so the corridor wall can be re-alligned to allow the conversion from corridor accommodation to open seating.
The Totnes half of the Buckfastleigh side has had the lower cladding sheets fitted so it’s catching up on the Staverton side.
August 2018
| |
| Behind the scaffolding, the last top sheet is fitted to the Totnes half of the Buckfastleigh side | |
| ©GRB 2018 | |
The Totnes half of the Buckfastleigh side now has most of its roof and the galley doorpost on this side has been repaired ready for the door.
The sidesheets are also complete to this point meaning half the sides have now been reclad.
In the galley the old compartment D bulkhead has been replaced with a new one and so compartment C has now been dismantled ready for new floor joists, floor and replacement compartments C/D bulkhead.
June 2019
| |
| The new compartment C/D floor; note the reinforcement in the left hand panel. | |
| |
| The double doors at the Totnes half of the Buckfastleigh side have now been hung | |
| ©GRB 2019 | |
With 2180 in Carriage and Wagon great progress has been made on the frames and cladding. The end frames have been rebuilt to take the corridor connections and the timbers below the windows on the Staverton side, Ashburton, end have been replaced as has the steel cant rail over the Ashburton end door.
Seen here the double doors on the Totnes end, Buckfastleigh side, have now been hung and close properly though the furniture and the door head stop are still to be fitted.
In the galley, the new floor for compartment D is in place and the re-inforcement for the corridor door post can be seen.
The compartments C/D bulkhead, which goes on top of the dividing floor joist, is being replaced with a new one which has the repositioned corridor to make the 2 plus 4 seating “snugs”
July 2019
| |
| |
| The ‘A’ ( Dynamo ) end of 2180 with buffers and drawhook removed. | |
| |
| One of the spring assemblies. | |
| ©GRB 2019 | |
With 2180 still in Carriage and Wagon progress has been continuing a pace. The ‘A’ end buffers and draw hook have been removed for examination and to allow the last of the joist supports to be re-instated.
The chassis has been needle gunned and wire brushed in readiness for priming and repainting.
September 2019
The snug walls are now structurally complete and await the finish cladding which will happen next year.
The Staverton side of 2180 now has all its new steel cladding so the next phase is to weld the sheets together at the windows to form a single sheet.
The framework at the ends is nearing completion with the corridor connection thresholds being formed and fitted.
The former toilet roof tank apperture has been filled in because the new tanks fit from the inside.
The galley walls are in the process of being installed and the corridor is taking shape.
December 2019
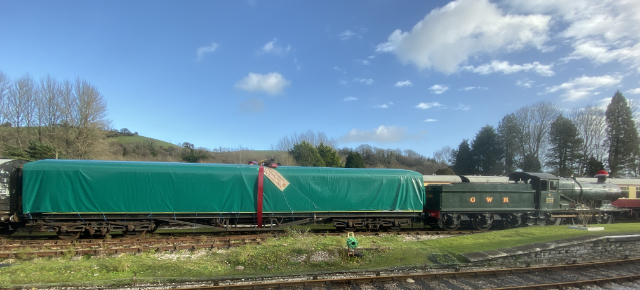
| |
| 2180 in protective cocoon. | |
| ©GRB 2019 | |
In order to make way for some essential maintenance of the rest of the stock 2180 has been wrapped up to keep it dry. 2180 is seen here on Road 1 ready for Christmas !
Due to the global COVID19 pandemic and the lack of covered workspace there has been no progress on 2180.
Hopefully there will be further progress in the near future but the existing fleet has to take priority.

© South Devon Railway 2007–23